
How To
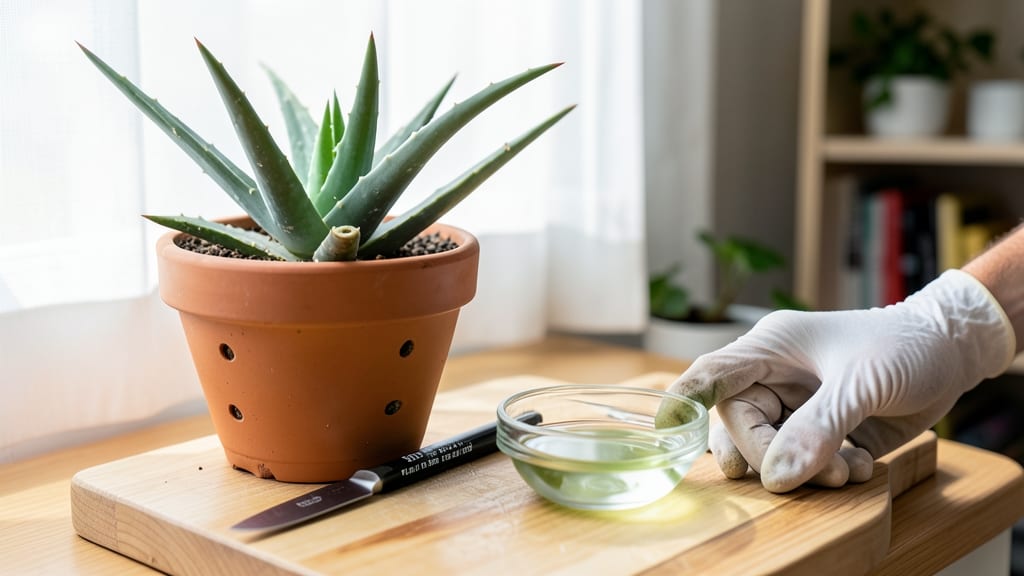
Harvesting aloe vera gel from mature leaves is simpler than you think — and with the right technique, you can get the purest, most potent gel without wasting a drop or harming your plant.
Picture this: you’ve waited 12-18 months for your aloe vera 🌱 to grow thick, plump leaves, only to slice open a leaf and end up with bitter sap and half the gel stuck to your hands. That’s the frustration I’m here to fix.
Below, I’ll walk you through the exact steps to harvest aloe vera like a pro—from picking the right leaves to extracting gel without bitterness, storing it properly, and even encouraging your plant to bounce back stronger than ever.
You’ll learn which tools to use, how to avoid common mistakes, and the one trick that keeps your aloe vera thriving for future harvests. Ready to turn those thick leaves into fresh, usable gel?

Step-by-step guide to harvesting aloe vera leaves correctly
Harvesting aloe vera leaves correctly ensures you get the highest gel yield while keeping your plant healthy for future harvests. The key is timing, proper tools, and gentle handling to avoid stressing the plant.
I’ve learned that over-harvesting or using dull tools can damage the plant and reduce gel quality—so let’s fix that together.
Before you begin, identify the right leaves to harvest. Look for outer leaves that are 8-12 inches long with brownish-yellow tips. These are mature and ready for harvest, while younger, green-tipped leaves should stay on the plant. Skipping this step often leads to bitter-tasting gel or stunted plant growth.
Gather your tools: a sharp knife or pruning shears, rubbing alcohol (to sterilize tools), gloves (to avoid skin irritation from the sap), and a clean bowl for storing leaves. Sterilizing your tools is a non-negotiable step—it prevents bacterial infections that can harm your aloe vera.
How to Harvest Aloe Vera Leaves
- 1 Wash your hands and sterilize your knife with rubbing alcohol. This reduces the risk of introducing pathogens to the plant.
- 2 Choose the right leaf: Select an outer leaf with a brownish-yellow tip and 8-12 inches in length. Gently wiggle it to ensure it pulls away easily.
- 3 Cut at the base: Use your sterilized knife to make a clean, straight cut at the leaf’s base, as close to the soil as possible. Avoid tearing the leaf, which can damage the plant.
- 4 Let the sap drain: Place the leaf in a clean bowl and let it sit for 10-15 minutes to allow the yellow latex sap (which can cause stomach upset) to drain away.
- 5 Store the leaf: Wrap the leaf in paper towel or place it in a paper bag in the fridge for up to 7 days before processing. This preserves freshness for gel extraction.
One of the biggest mistakes I see is cutting too many leaves at once. Your aloe vera plant can handle 1-2 leaves per harvest, but removing too many weakens the plant and slows regrowth. Always leave the inner leaves intact—they’re the plant’s energy source for recovery.
After harvesting, avoid watering the plant for 7-10 days. This allows the cut area to callous over and reduces the risk of rot or infection. I also recommend placing the pot in a shady spot for a few days to help the plant recover from stress.
If you’re harvesting aloe vera in hot climates, do it in the early morning when temperatures are cooler. This minimizes stress on the plant and keeps the gel fresh. In cooler months, avoid harvesting altogether—aloe vera grows slower and needs all its energy to survive.
Pro tip: Label your harvested leaves with the date of harvest. This helps you track freshness and ensures you use the oldest leaves first for gel extraction. Over time, you’ll notice your aloe vera plant regrows leaves faster if you follow these steps—it’s a rewarding cycle!
Remember, patience is key. A well-cared-for aloe vera plant can produce new leaves every 6-12 months, giving you a steady supply of fresh gel. By following these steps, you’ll maximize your yield while keeping your plant thriving for years to come.
How to extract aloe vera gel without bitterness or waste
Once you’ve harvested your aloe vera leaves, the next step is extracting the gel without bitterness. This process requires precision to avoid wasting the leaf’s gel content or introducing unwanted flavors.
The key lies in proper preparation and technique, which I’ll break down step by step to ensure you get the purest, most effective gel every time.
Start by selecting a mature leaf with a brownish tip—this indicates it’s ready for harvest. The gel inside these leaves is at its peak potency, but only if you handle it correctly. Skipping preparation steps can lead to bitter-tasting gel or even yellowing, which ruins its soothing properties.
Let’s dive into the exact methods to extract gel that’s clear, fresh, and free of bitterness.
⚠️ Critical Step: Avoid Yellow Sap
The yellow latex found just beneath the leaf’s skin is bitter and can irritate skin. To remove it completely:
- Rinse the leaf under cool water to wash away surface debris.
- Dry it thoroughly with a clean towel—moisture speeds up latex release.
- Slice lengthwise and let the latex drain out for 5–10 minutes before scraping.
⚠️ Never skip this step! Skipping drainage will leave bitter residue in your gel.
After rinsing, use a sharp knife or peeler to slice the leaf lengthwise from base to tip. This exposes the translucent gel beneath the latex layer. Let the leaf sit upright in a bowl for 5–10 minutes—this allows the yellow sap to drip out naturally.
Patience here prevents bitterness from seeping into your gel.
Once the latex has fully drained, use a spoon or gel scraper to gently remove the gel from the leaf. Work from the base upward to avoid tearing the leaf and wasting gel. For maximum yield, press lightly on the leaf’s inner walls—this releases any trapped gel.
Store the gel in an airtight container in the fridge for up to 7–10 days to preserve its potency.
To extend shelf life, consider blending the gel with a small amount of water or aloe vera juice before storing. This prevents oxidation and keeps the gel clear and fresh for longer. Label your container with the harvest date to track freshness—older gel loses its soothing properties over time.
Pro tip: If your gel turns slightly yellow after extraction, it’s not ruined—simply blend it with fresh lemon juice or vitamin C to restore its clarity. This trick works wonders for maintaining the gel’s pale, natural color and effectiveness.
With these steps, you’ll always have bitter-free, high-quality aloe vera gel ready for skincare or soothing remedies.