
How To
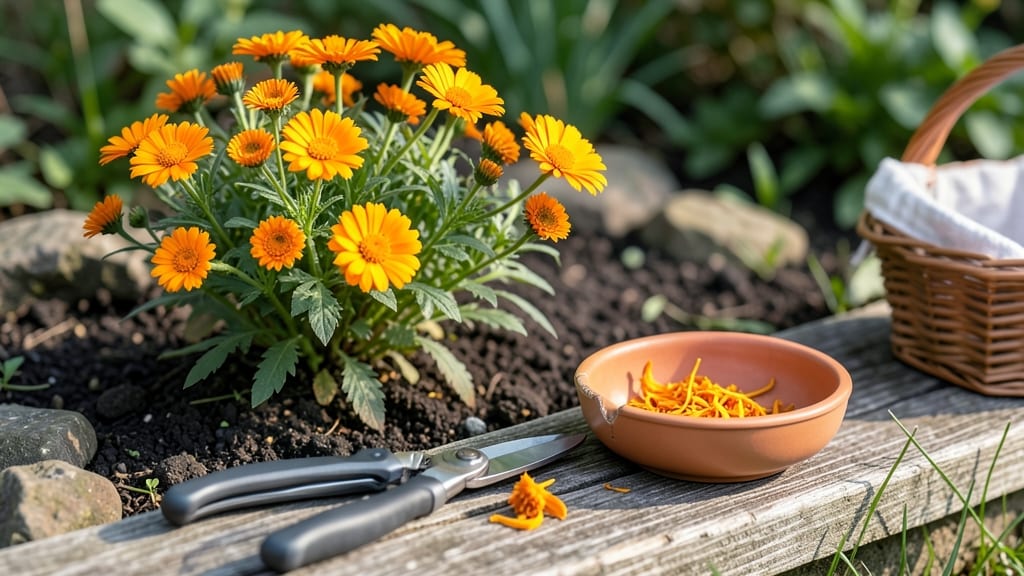
To harvest calendula for tea, you’ll want fully bloomed petals with just a hint of browning at the center — the golden window for the best flavor and medicinal benefits.
Calendula isn’t just a beautiful garden flower—when harvested and dried correctly, its golden petals become a soothing, anti-inflammatory tea that’s perfect for skin healing and stress relief. But timing and technique make all the difference in flavor and potency.
Most gardeners miss the best time to pick calendula, often waiting too long or harvesting in wet conditions, which ruins the drying process. The key is morning harvests on dry days, when petals are crisp and vibrant.
In this guide, I’ll walk you through the exact steps to harvest, dry, and store calendula for the most flavorful tea, plus pro tips to extend its shelf life and boost its healing properties.

When and how to harvest calendula petals for maximum tea potency
Harvesting calendula petals at the right time transforms them from pretty blooms into potent tea ingredients. The key lies in understanding flower maturity and harvest timing, which directly impact flavor and medicinal properties.
I’ve found that even a few hours difference can change how vibrant your dried petals turn out.
For the best tea potency, focus on picking flowers when they’re fully open but haven’t yet started to brown. This peak bloom stage ensures maximum essential oils and anti-inflammatory compounds. Morning harvests work best because dew has evaporated, reducing moisture that can lead to mold during drying.
🌼 5 Key Steps to Harvest Calendula for Tea
- 1. Choose the right time: Harvest between 8-10 AM on sunny, dry days when petals are fully open but centers show no browning.
- 2. Select mature flowers: Look for bright orange/yellow petals with firm stems—avoid wilted or partially closed blooms.
- 3. Use clean tools: Snip stems with sharp scissors (2-3 inches below the flower) to encourage bushier growth.
- 4. Handle gently: Remove petals by hand (or with tweezers) to avoid damaging leaf tissue that can affect flavor.
- 5. Process immediately: Lay petals in a single layer to dry within 2 hours of harvest to preserve potency.
Never harvest overcast days—high humidity slows drying and risks mold. I once tried harvesting calendula after a rain shower, and my entire batch developed black spots during drying. The lesson? Always wait for clear skies and morning sunlight.
Did you know calendula petals contain up to 3x more flavonoids when harvested at peak maturity? These compounds give the tea its anti-inflammatory and skin-soothing benefits. The earlier you pick flowers, the more vibrant the color and stronger the flavor in your finished tea.
For continuous harvests, pinch off spent blooms regularly to encourage new flowers. This method keeps your calendula plants producing for 6-8 weeks during peak season. Just avoid cutting more than 1/3 of the plant at once to prevent stress.
Freshness is critical—petals left wilting on the stem lose 50% of their essential oils within 6 hours. That’s why I always process my harvests immediately. If you’re harvesting a large batch, work in small groups to maintain quality throughout.
Pro tip: Label your harvests by date and variety. Some calendula cultivars (like 'Bonanza' or 'Moonlight') have stronger flavors than others. Keeping records helps you replicate your best-tasting tea blends year after year.
Remember, gentle handling preserves more of the delicate petal structure. Rough harvesting can tear petals, reducing their surface area for drying and tea infusion. Treat your calendula like you would delicate orchid petals—with care and patience.
Once you’ve mastered the harvest, the next step is drying. But that’s a story for our next section—where we’ll compare air-drying vs. dehydrator methods to get the most out of your petals. Stay tuned! 🌿
Step-by-step calendula drying methods for tea: air-drying vs. dehydrator
Once you’ve harvested your calendula petals at peak freshness, the next critical step is drying them properly to preserve their medicinal properties and vibrant flavor. The two most popular methods—air-drying and using a dehydrator—each have unique advantages depending on your environment and time constraints.
I’ll walk you through both techniques, including how to control humidity, test for perfect dryness, and store your tea for long-term use.
For air-drying calendula, you’ll need a well-ventilated space with low humidity (ideally below 50%) to prevent mold. This traditional method is free but requires patience, as it can take 1-2 weeks to fully dry the petals.
On the other hand, a dehydrator speeds up the process to just 4-6 hours, making it ideal for large harvests or humid climates. Both methods yield potent tea, but the key lies in monitoring moisture levels and handling gently to avoid bruising.
| Factor | Air-Drying | Dehydrator |
|---|---|---|
| Time Required | 1-2 weeks | 4-6 hours |
| Humidity Needs | Below 50% | N/A (controlled) |
| Equipment Needed | Hang strings, paper bags | Dehydrator trays |
| Best For | Small batches, dry climates | Large batches, humid areas |
| Storage Life | 1-2 years (airtight) | 1-2 years (airtight) |
| Flavor Preservation | Excellent (slow oxidation) | Excellent (fast, even drying) |
To air-dry calendula petals, start by gently removing them from the stems and laying them in a single layer on a clean, breathable surface like a mesh screen or paper towel.
Bundle stems together and hang upside down in a dark, dry place with good airflow, such as a closet with a fan or an attic. Check daily for mold signs (black or green spots) and remove any affected petals immediately.
Once fully dry, they should crush easily between your fingers with no moisture.
Using a dehydrator simplifies the process by eliminating humidity concerns. Preheat your dehydrator to 95°F (35°C) and arrange petals in a single layer on trays, ensuring they don’t overlap. Prop open any petals that are still curled to maximize airflow.
After 4-6 hours, remove and test for dryness by crushing a few petals—if they’re brittle and free of moisture, they’re ready. This method is especially useful in humid climates where air-drying risks mold.
After drying, store your calendula tea petals in an airtight glass jar away from direct sunlight to preserve their anti-inflammatory compounds. Label with the date and test the flavor after 6 months to ensure potency.
Whether you choose air-drying or a dehydrator, the goal is the same: retain vibrant color and medicinal properties for a soothing, homegrown brew.
Pro tip: For a stronger tea infusion, lightly toast dried petals in a dry pan for 1-2 minutes before brewing—this enhances their aromatic oils without cooking them. Just be sure to cool them completely before storing.