
How To
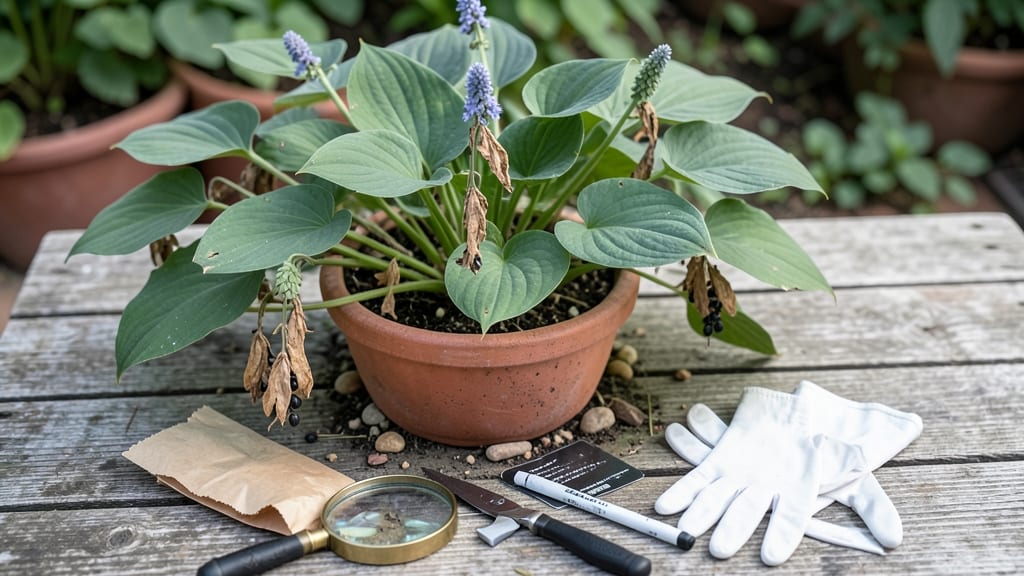
Harvesting hosta seeds from dried seed pods in late summer is the easiest way to grow new plants without digging up divisions.
You’ve spent months admiring your 🌿 hostas, but those unassuming seed pods are where the real magic happens—if you know when to collect them. Miss the window, and you’ll end up with shriveled seeds or wasted effort.
Timing is everything: pods must turn brown and crack open naturally, signaling they’re ready for harvest. Too early, and seeds won’t germinate; too late, and they’ll scatter on their own.
In this guide, I’ll walk you through how to spot ripe pods, collect seeds without damaging your plants, and store them for the best chance at growing fresh hostas next season.

When to harvest hosta seeds: identifying ripe seed pods & cracking stages
Harvesting hosta seeds at the right moment ensures the highest germination rates and healthy new plants. The key is watching for brown, cracked seed pods—a sure sign your seeds are ready.
Timing matters because harvesting too early means immature seeds, while waiting too long risks losing viable seeds to weather or pests.
Hosta seed pods develop through distinct stages, from green and firm to dry, brown, and brittle. I’ve learned the hard way that rushing the harvest leads to seeds that won’t sprout.
Patience pays off when you wait for the pods to naturally crack open, revealing plump, dark seeds inside. This usually happens in late summer to early fall, depending on your climate.
Visual cues are your best friends here. Look for pods that have turned a deep brown color and feel crispy to the touch. When you gently squeeze a pod, it should split open easily, and the seeds inside should look firm, not shriveled. These are the signs you’ve hit the perfect harvest window for maximum seed viability.
| Stage | Pod Appearance | Seed Condition | Action |
|---|---|---|---|
| Early Development | Green and firm | Soft, underdeveloped | Leave alone |
| Maturing | Turning brown, slightly dry | Firming up | Monitor closely |
| Ripe and Ready | Deep brown, brittle, cracking | Plump, dark, dry | Harvest immediately |
| Overripe | Dry, split open, empty | Scattered or shriveled | Too late |
In my garden, I’ve found that September through October is the ideal window for harvesting hosta seeds in USDA Zone 6. The cooler temperatures slow down seed dispersal, giving you more time to collect them before they scatter.
If you’re in a warmer climate, like Zone 8 or 9, you might need to harvest as early as late August to avoid losing seeds to heat or rain.
One trick I use is to mark mature pods with a small flag or twine when they first turn brown. This helps me keep track of which pods are ready without accidentally harvesting too soon.
I also avoid harvesting on humid days, as moisture can reduce seed viability. Instead, I wait for a dry, sunny morning to collect my seeds.
If you’re unsure whether a pod is ready, perform the "squeeze test". Gently press a pod between your fingers—if it cracks open easily and releases seeds, it’s harvest-ready.
If it resists or feels moist, give it a few more days. This simple test has saved me from collecting underripe seeds that wouldn’t germinate.
Don’t overlook the importance of seed pod location on the hosta plant. The oldest, most mature pods are usually found at the base of the flower stalk, near where the flowers once bloomed.
These pods tend to ripen first and are often the most viable. I always start harvesting from the bottom of the stalk and work my way up to avoid missing any ripe pods.
Once you’ve identified the perfect pods, act quickly. Seeds can scatter or degrade within days of the pods cracking open. I recommend harvesting seeds within 24 hours of the pods splitting to ensure the best chances of successful germination.
Store them in a cool, dry place until you’re ready to plant them in the spring.
Pro tip: If you’re harvesting seeds for long-term storage, place them in a paper envelope rather than a plastic bag. Paper allows for moisture evaporation, preventing mold and maintaining seed viability. Label each envelope with the hosta variety and harvest date—trust me, you’ll forget otherwise!
Timing your harvest correctly is the first step toward growing a thriving collection of hostas from seed. With these visual cues and a little patience, you’ll be well on your way to expanding your garden naturally. Happy harvesting! 🌿
Step-by-step hosta seed harvesting process for maximum germination rates
Harvesting hosta seeds at the right time ensures high germination rates and healthy new plants. The key is patience—wait until seed pods turn completely brown and begin cracking open naturally. Rushing the process risks underdeveloped seeds that won’t sprout, while waiting too long may scatter seeds prematurely.
Gather your tools first: a pair of clean pruning shears, a small paper bag or envelope for collection, and a labeling marker to track varieties. Work on a dry, sunny day to prevent moisture from damaging seeds during handling. Always wear gloves to avoid skin irritation from hosta sap.
How to Harvest Hosta Seeds
-
Step 1: Locate Mature Seed Pods
Find pods that are fully brown and brittle to the touch. They should crack open naturally when gently squeezed.
-
Step 2: Cut Pods Carefully
Use sterilized pruning shears to snip pods from the stem, leaving a small stem attachment to make handling easier.
-
Step 3: Shake Out Seeds
Place pods in a paper bag and gently shake to release seeds. Avoid crushing pods to prevent seed damage.
-
Step 4: Clean and Dry Seeds
Remove any debris or chaff by sifting seeds through a fine mesh. Spread seeds on a paper towel in a warm, dry place for 3–5 days.
-
Step 5: Store Properly
Transfer dried seeds to a sealed envelope or airtight container with a desiccant packet. Label with the variety name and harvest date.
-
Step 6: Test Viability (Optional)
For best results, test germination by placing 10 seeds on a damp paper towel in a ziplock bag for 2 weeks. Count sprouted seeds to gauge success.
After harvesting, store seeds in a cool, dark place (like a refrigerator) to maintain viability. Most hosta seeds remain viable for 1–2 years if stored properly, though germination rates drop after the first year. For best results, plant seeds as soon as possible in well-draining soil with partial shade.
If you’re new to seed saving, start with one or two hosta varieties to practice timing and techniques. Over time, you’ll develop an eye for the perfect moment to harvest—when pods are dry but haven’t yet scattered their seeds on their own.
Remember, patience is key. Rushed harvesting leads to low-quality seeds, while waiting too long may mean losing your harvest entirely. With the right approach, you’ll enjoy a bountiful supply of hosta seedlings ready to expand your garden next season! 🌱