
How To
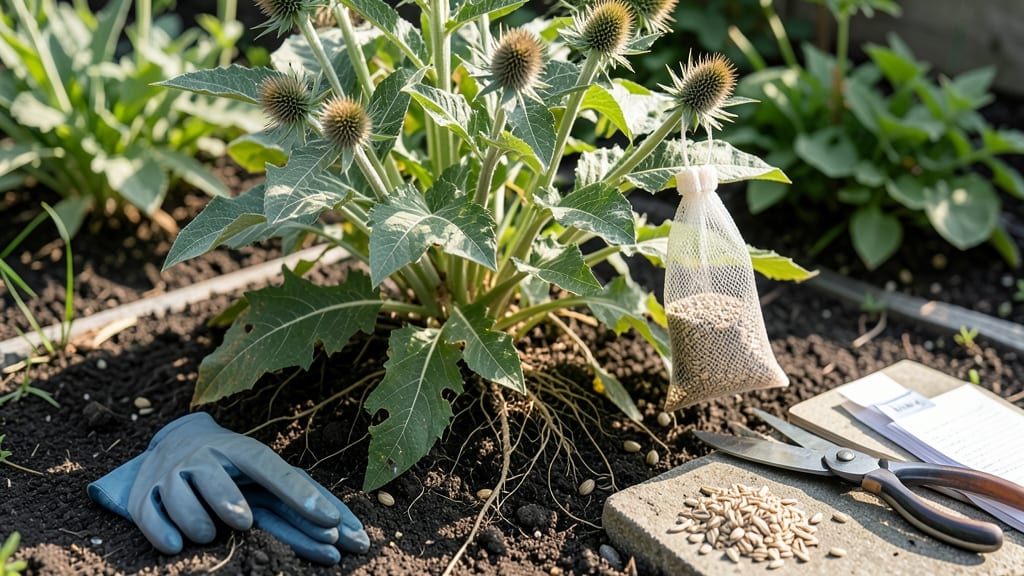
Harvesting milk thistle seeds at the right time means unlocking their full liver-supporting potential—when they’re too early, you get bitter, underripe seeds, and too late means bird damage or wasted effort.
If you’ve ever stared at your 🌿 milk thistle plants wondering, "Are these seeds ready yet?"—this is your guide. We’ll cover the 3 key signs of ripeness, from flower head color shifts to seed detachment tests, so you never miss the perfect window.
Beyond timing, I’ll walk you through the tools you’ll need (spoiler: a clean bucket and a dry day are non-negotiable), how to dry seeds properly to avoid mold, and whether to hand-harvest or use a machine for large batches.
By the end, you’ll know exactly when to pull those spiky seed heads, how to store them for maximum potency, and the one mistake that ruins even the best harvest—so you can go from garden to supplement shelf with confidence.

3 Visual signs your milk thistle is ready for seed harvesting
Timing your milk thistle seed harvest is everything—get it wrong, and you’ll end up with either underripe seeds (low in silymarin) or overripe seeds that’ve already attracted birds. The key lies in watching for these three visual cues that signal peak ripeness.
I’ve learned the hard way that rushing the harvest means bitter, ineffective seeds, while waiting too long means losing your entire crop to wildlife.
First, focus on the flower heads. When milk thistle blooms, its purple flowers transform into spiky brown seed heads. This color shift is your first major clue.
The flower petals will wilt and fall away completely, revealing the seed-filled bracts beneath. If you still see any purple lingering, the seeds aren’t ready—wait a few more days.
Next, examine the seed color inside the bracts. Mature milk thistle seeds should turn a deep brown or almost blackish hue. When fully ripe, they’ll feel firm to the touch, not soft or crumbly.
I once harvested seeds that were light tan and ended up with a yield that was only 30% as potent—a costly mistake for herbalists like me.
Finally, check the plant’s overall maturity. By late summer or early fall, your milk thistle should show signs of natural decline. The leaves may yellow slightly at the edges, and the stems might soften near the base.
This isn’t a sign of disease—it’s the plant redirecting energy to seed production. If your plants look too lush with green leaves, they’re not ready yet.
Flower Head Transformation
Watch for purple petals to wilt and fall, revealing brown bracts. Use a magnifying glass to check for visible seeds inside.
Seed Color Shift
Seeds should turn deep brown/black. Press a seed—if it’s firm and dry, it’s ready. Light tan seeds are underripe.
Plant Maturity Cues
Look for yellowing leaves, softening stems, and dry flower stalks. These signs mean the plant is focusing on seeds.
Pro tip: Harvest on a dry, sunny morning when seeds have low moisture content. This prevents mold during drying. I’ve found that late September is the sweet spot in USDA Zone 6, but adjust for your climate—some regions can harvest as early as August.
One mistake I made early on was waiting until the seed heads split open naturally. By then, birds and squirrels had already feasted on half my crop. Instead, harvest when about 70% of the seed heads show these signs—leave a few to mature naturally as a backup.
If you’re unsure whether your seeds are ready, do the float test: Drop a few seeds in water. Ripe seeds sink immediately, while underripe ones float.
This quick trick saved me from harvesting a half-baked batch last year. Now I use it as my final check before committing to a full harvest.
Remember, silymarin potency peaks at full ripeness. Harvesting too early means losing that liver-supporting compound you’re after. But if you wait too long, you risk seed shattering or animal damage. The 3-sign method above keeps me on track every harvest season.
Once you’ve confirmed ripeness, act fast! The window between perfect ripeness and overripe is narrow—sometimes just 2-3 days. Grab your pruning shears or scissors, and cut the seed heads just above the leaf nodes to encourage more production.
Step-by-step guide to collecting and processing milk thistle seeds
Once you’ve spotted the three key signs of ripe milk thistle seeds, it’s time to act quickly. The processing window is narrow—wait too long, and birds or weather will ruin your harvest.
I’ll walk you through the entire process, from gathering tools to storing seeds for future planting or medicinal use. The goal? Maximize yield while preserving the silymarin potency in those precious seeds.
Start by gathering your essential tools: a pair of sharp pruning shears, a clean bucket or tarp, and a paper bag or mesh sack for drying. You’ll also need a fan or dehumidifier for proper drying, and a fine-mesh sieve to separate seeds from chaff.
Work on a dry, sunny day when humidity is low—this minimizes mold risk and speeds up processing.
How to Harvest Milk Thistle Seeds
-
Step 1: Cut the flower heads
Use clean pruning shears to snip the entire flower head when it turns brown and papery. Cut 1-2 inches below the base to avoid damaging the plant.
-
Step 2: Lay out for drying
Spread the cut heads on a clean tarp or screen in a shady, well-ventilated area. Avoid direct sun to prevent overheating, which can reduce seed viability.
-
Step 3: Dry for 7-10 days
Turn the heads daily to ensure even drying. They’re ready when the seeds rattle inside and the heads feel light and brittle. A dehumidifier speeds this up in humid climates.
-
Step 4: Separate seeds from chaff
Rub the dried heads between your hands or use a fine-mesh sieve to shake out the black-and-white striped seeds. Discard the chaff and empty husks—these have no value.
-
Step 5: Store seeds properly
Place seeds in a paper envelope or airtight container with a desiccant packet. Store in a cool, dark place (like a pantry) where they’ll stay viable for 2-3 years.
After separating the seeds, you’ll notice they’re small and striped—this is normal! The black stripes are a natural variation and don’t affect potency. If you’re growing milk thistle for medicinal use, avoid washing the seeds, as this can strip away beneficial oils.
For culinary purposes, lightly toast them to enhance flavor while preserving their nutritional benefits.
One common question I hear is: “Can I harvest milk thistle seeds by machine?” While large-scale growers use threshers, home gardeners should stick to hand-processing. The spiny leaves make mechanical harvesters impractical, and the seeds are delicate enough that machines can crush them, reducing yield and potency.
If you’re new to seed saving, label your containers with the harvest date and variety (if applicable). This helps track seed viability over time. For next year’s garden, plant your saved seeds in well-draining soil after the last frost—just like the original plant.
With proper care, your milk thistle will reward you with even more potent seeds the following season.