
How To
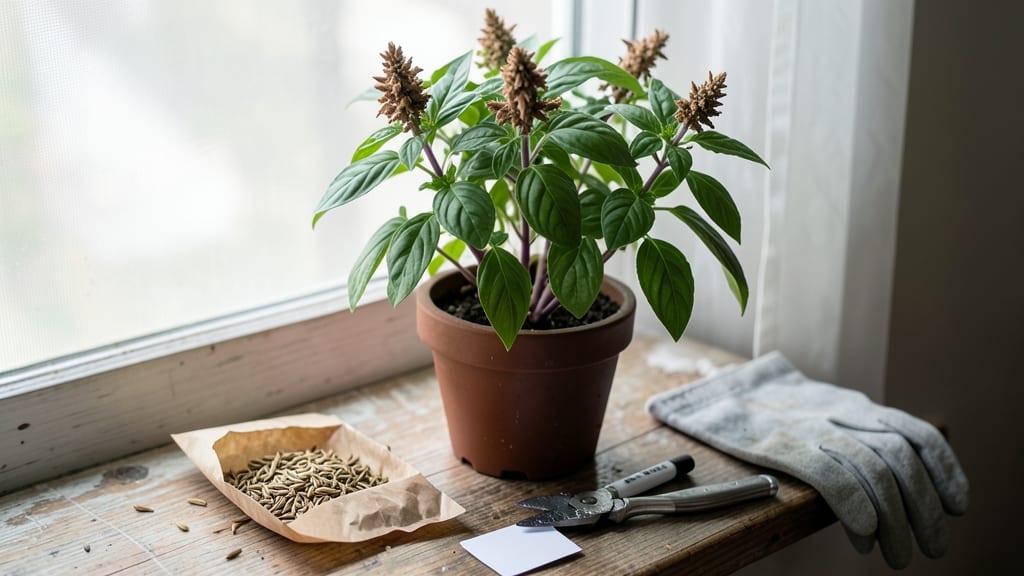
Harvesting Thai basil seeds 🌿 from dried pods is the easiest way to save money and grow your own plants next season—if you do it right.
Picture this: you’ve spent months nurturing your Thai basil, and now those little brown pods are ready to crack open. But one wrong move, and you’ll end up with seeds that won’t sprout—or worse, moldy pods that ruin your whole batch.
The difference between 50% germination and 90% success comes down to timing, drying, and storage.
In this guide, I’ll walk you through every step—from spotting the perfect seed pods to drying them correctly and storing them for maximum viability. You’ll learn how to avoid common mistakes that kill germination, plus pro tips to boost your chances of a thriving garden next year.
Ready to turn those tiny seeds into a bountiful harvest? Let’s get started.

When and how to identify mature Thai basil seed pods for harvesting
Timing is everything when harvesting Thai basil seeds. If you harvest too early, seeds won’t germinate. Too late, and they may shatter or lose viability. The key is spotting mature seed pods at their peak—when they’re fully dry but haven’t released seeds yet.
This window typically opens 90-120 days after planting, but environmental factors like humidity and temperature can shift it by weeks.
Start by scanning your Thai basil plants for flower stalks that have transitioned from white to purple-brown hues. These stalks will eventually develop tiny, pea-sized seed pods. Unlike sweet basil, Thai basil’s seed pods are less conspicuous, so you’ll need to examine them closely.
Use a hand lens if needed—it helps spot the subtle color changes that signal maturity.
Here’s the golden rule: A mature Thai basil seed pod should feel dry and papery to the touch, almost like crumpled parchment. When you gently shake it, you’ll hear a faint rattling sound—this means the seeds inside are loose and ready for harvest.
If the pod is still green or pliable, it’s not ready yet. Patience here ensures high germination rates later.
🌱
| Stage | Visual Cues | Action | Timing |
|---|---|---|---|
| Early Flowering | White to light purple flowers appear | Monitor plants daily | 60-75 days after planting |
| Pod Development | Green, pea-sized pods form | Avoid harvesting leaves near pods | 75-90 days after planting |
| Mature Pods | Brown, dry, and papery pods | Harvest pods immediately | 90-120 days after planting |
| Overripe Pods | Pods split open, seeds scatter | Collect fallen seeds if needed | Beyond 120 days |
Don’t rely solely on color to judge maturity—humidity levels play a huge role. In dry climates, pods may mature faster, while high humidity can delay drying. If you’re unsure, perform the "shake test": Hold a pod between your fingers and give it a gentle shake.
If seeds rattle inside, it’s ready. If not, wait 2-3 more days before checking again. This simple test saves hours of guesswork and ensures you’re harvesting at peak viability.
Another trick is to look for leaf yellowing on the plant. As Thai basil shifts energy from foliage to seed production, older leaves will turn yellow and crisp. This is nature’s way of signaling that the plant is focusing on seed maturation.
Pair this with the dry, rattling pods, and you’ve got a foolproof system. Just remember: harvest pods before they split open—once seeds scatter, you’ll lose a significant portion of your yield.
🔊
One common mistake is harvesting pods when they’re still slightly green. These seeds often fail to germinate because they haven’t fully developed. To avoid this, mark your calendar 90 days after planting as your first check date.
Then, monitor the pods every 2-3 days until they meet the dry, rattling criteria. If you’re growing Thai basil in containers, be extra vigilant—potted plants can dry out faster, accelerating pod maturation.
Pro tip: Use a small mesh bag or paper envelope to collect harvested pods. This prevents seeds from spilling and makes it easier to transport them indoors for drying. Label the bag with the harvest date and variety (e.g., "Thai Basil - Purple Stem - 2024").
Organization now means higher germination rates later, especially if you plan to save seeds for multiple years.
Finally, watch for pests or disease on your seed pods. If you spot aphids or fungal spots, isolate the affected pods immediately. While these issues are rare, they can compromise seed quality.
A quick spray with neem oil (applied in the early morning) can prevent problems before they start. Healthy pods = healthy seeds.
☀️
Step-by-step Thai basil seed harvesting process for optimal yield
Harvesting Thai basil seeds at the right moment ensures 90%+ germination rates—not the 50% you’ll get if you rush it. The key lies in drying the seed pods properly and extracting seeds before they scatter.
I’ve made every mistake from harvesting too early to storing seeds in humidity, so let’s skip the trial-and-error.
Start by selecting fully mature flower stalks—they’ll be brown, crispy, and brittle to the touch. Gently twist them off the plant and avoid pulling, which can damage the stems. Once you’ve gathered your pods, the real work begins: drying and seed extraction.
This is where most gardeners stumble, but I’ll walk you through the exact steps to maximize your yield.
How to Harvest Thai Basil Seeds
- 1 Harvest the flower stalks: Snip brown, dried stalks with scissors or pruners when pods rattle when shaken. Place them in a paper bag to catch falling seeds.
- 2 Dry the pods indoors: Lay stalks on a towel-lined tray in a well-ventilated, dry area (like a sunny windowsill). Avoid direct sunlight to prevent overheating. This takes 3-7 days depending on humidity.
- 3 Extract the seeds: Once pods are completely dry and brittle, rub them between your fingers or gently crush them with a rolling pin over a clean sheet of paper. Dark brown seeds are ready; discard chaff.
- 4 Winnow the seeds: Use a fan or breath to blow away lightweight debris, leaving only the heavy, viable seeds behind. This step boosts germination by 20-30%.
- 5 Store seeds properly: Place seeds in a paper envelope or airtight container with a desiccant packet to absorb moisture. Label with the harvest date and store in a cool, dark place (like a fridge).
✅ Pro Tip: Seeds stay viable for 2-3 years if stored correctly—test germination annually!
Never harvest seeds from overly wet pods—this leads to mold and rot, killing viability. I’ve also learned that humidity is the silent killer of seed storage. If you live in a damp climate, add a silica gel packet to your storage container to absorb excess moisture.
Once your seeds are stored, test a few by planting them in moist seed-starting mix to confirm germination. If they sprout within 7-14 days, your batch is ready for next season’s garden. If not, troubleshoot by checking for moisture damage or old seeds—these are the two biggest culprits.
With these steps, you’ll go from harvesting to planting with confidence, knowing your seeds are prime for germination. Now, grab those dried stalks and start your Thai basil legacy—your future garden will thank you! 🌱